MetaMask
Introduction
MetaMask is a convenient UI for interacting with Ethereum-compatible blockchains (such as Bitfinity). For the purpose of this guide, we will assume you are already familiar with MetaMask and have it installed. If you need help getting started with MetaMask itself, check out their documentation.
Connecting Metamask to Bitfinity Automatically
The simplest way to connect to Metamask on the Bitfinity Network is to navigate to the get-started page, and connecting to the network by clicking on the add network button.
Manual Connection
Ensure you have Metamask installed. Open Metamask and in the top-right corner of the MetaMask interface, click the network selection drop-down and then click Custom RPC.
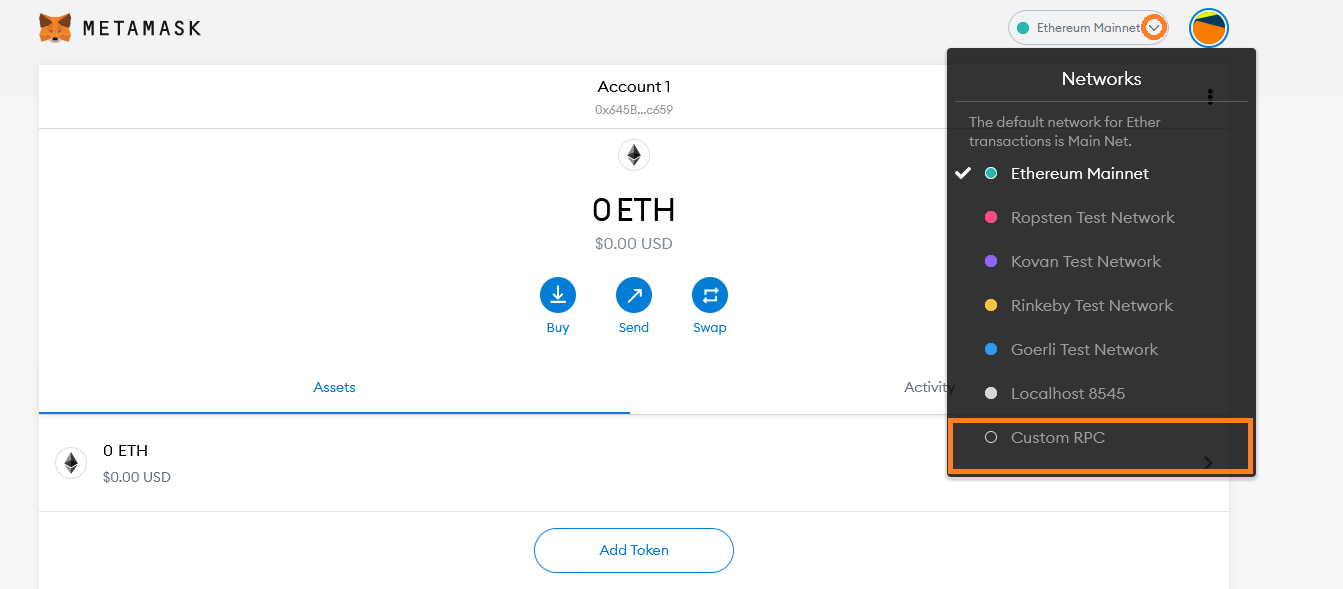
Screenshots in this tutorial are taken from the MetaMask browser extension version 9.5.5.
Fill in the form with the following information for mainnet:
- Network Name: Bitfinity MainNet
- New RPC URL:
https://mainnet.bitfinity.network/ - Chain ID: 355110
- Currency Symbol: BTF
- Block Explorer URL (Optional):
https://explorer.mainnet.bitfinity.network
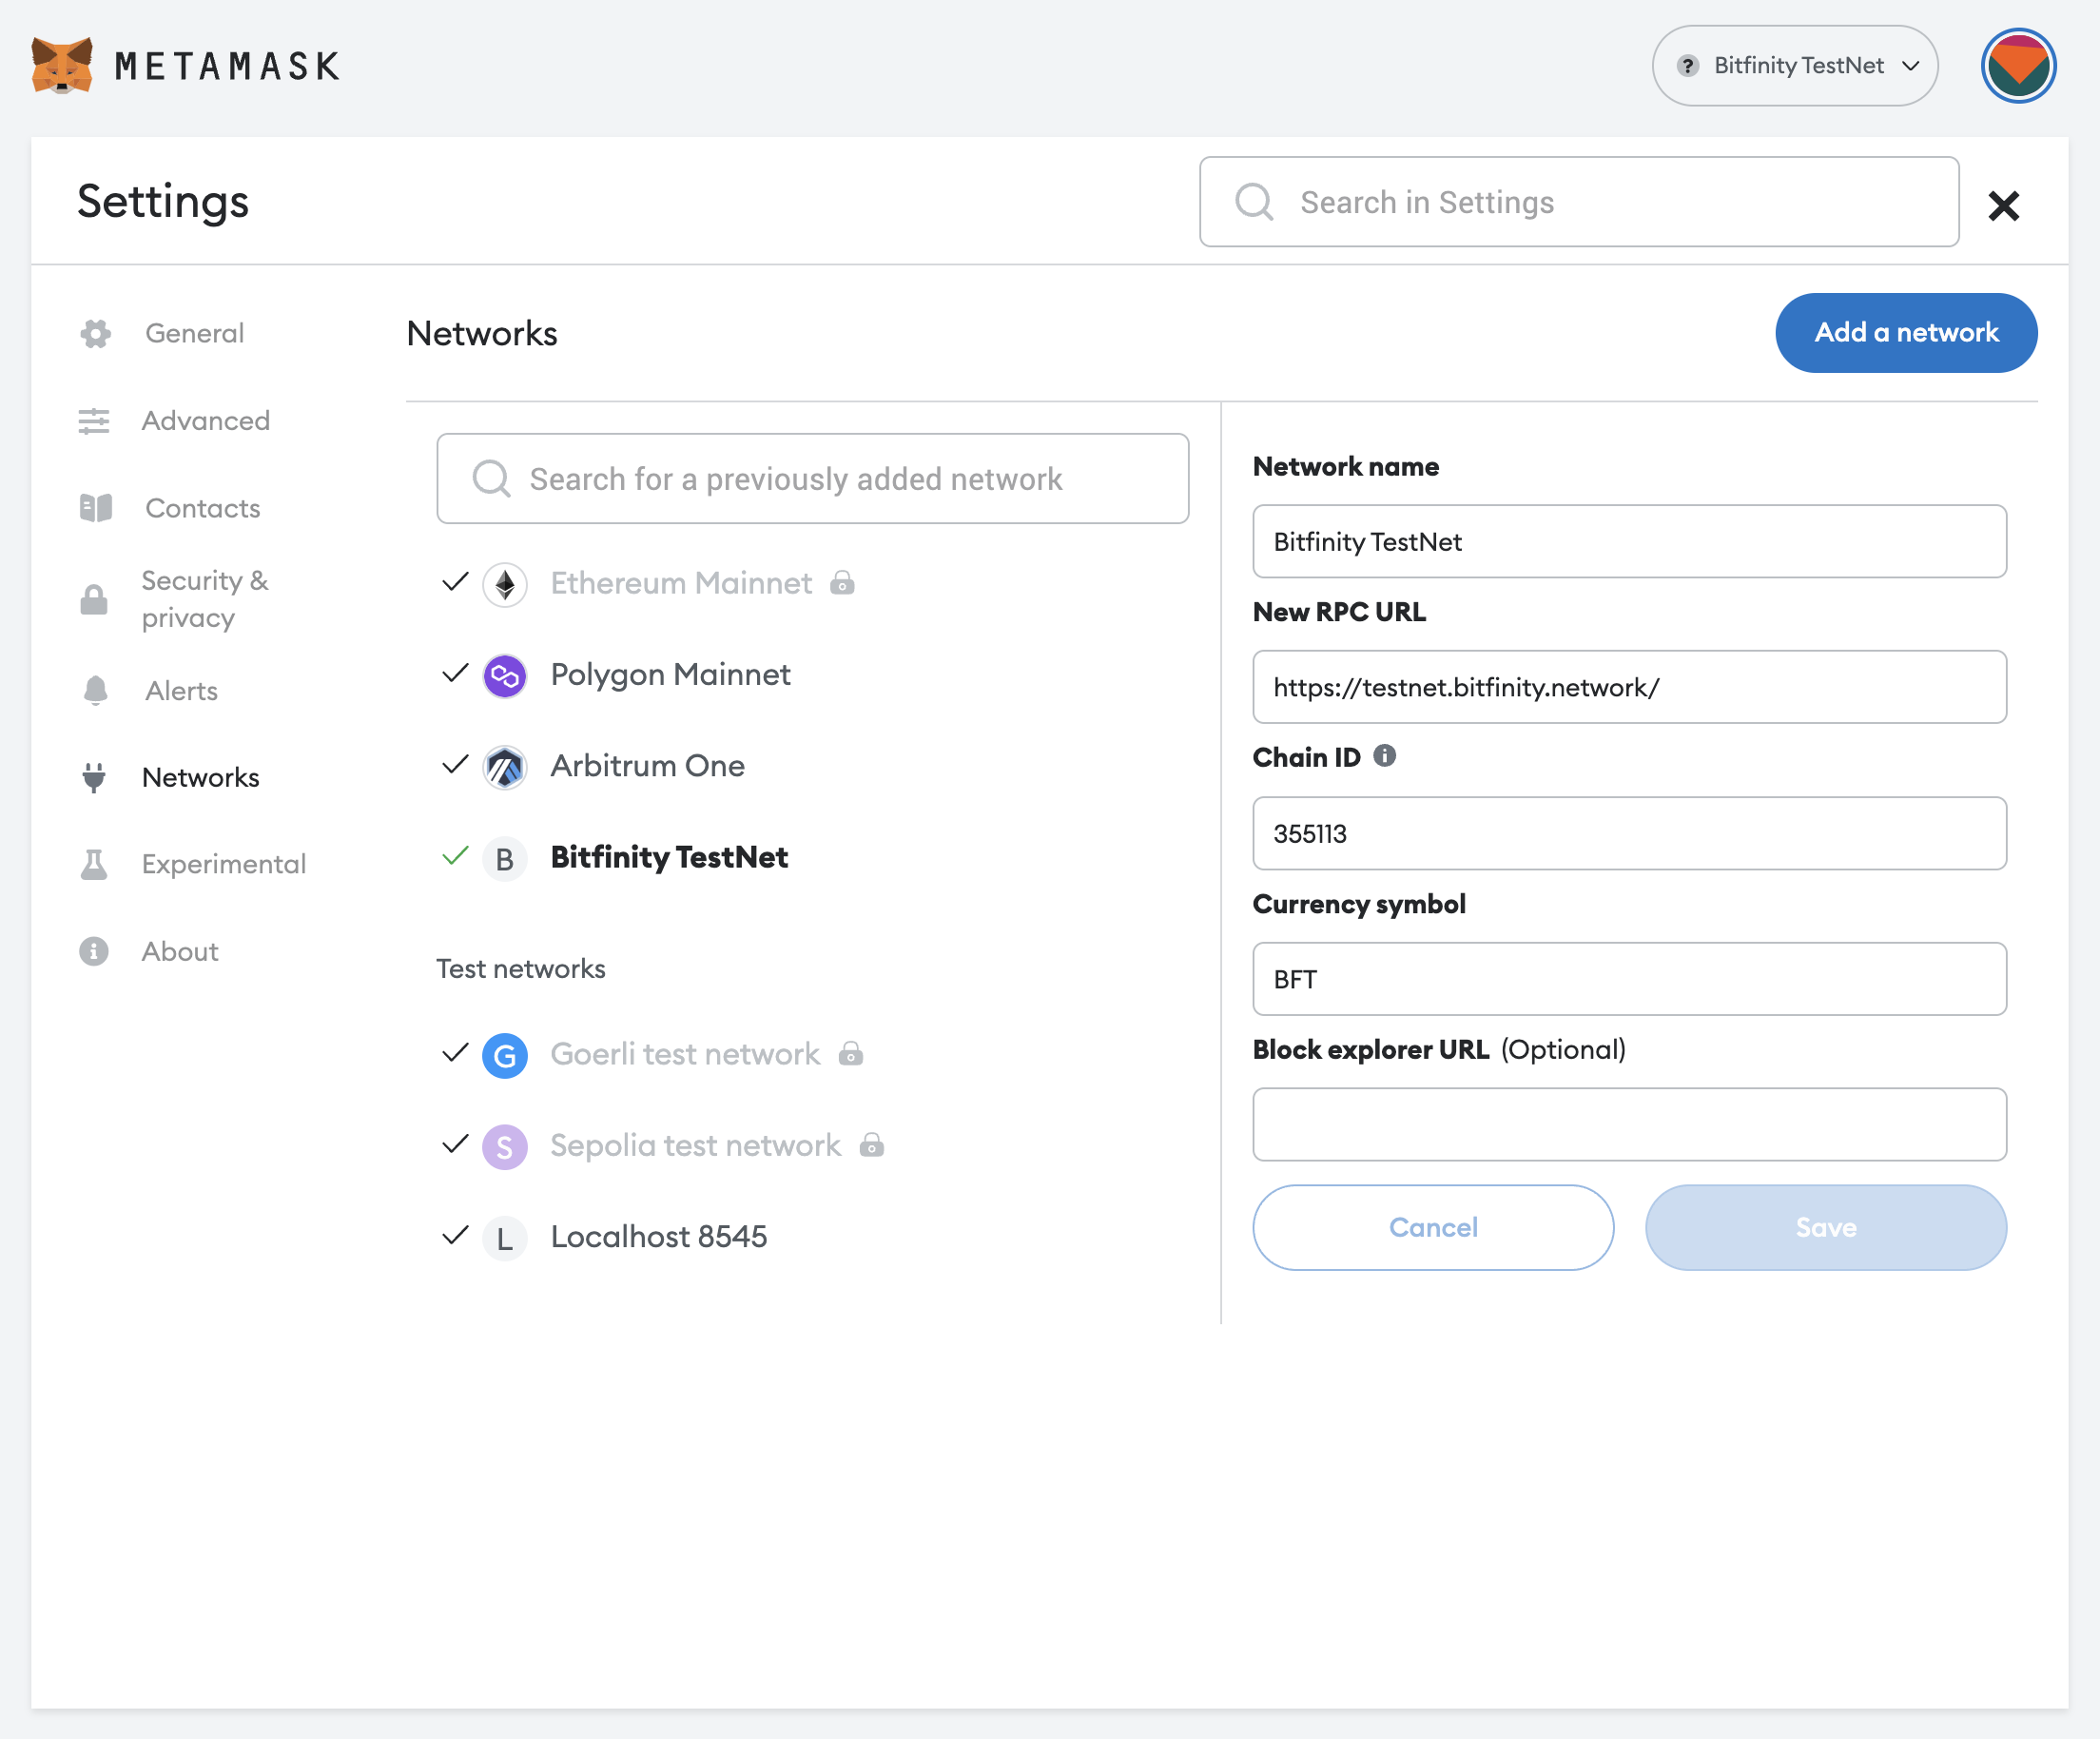
Fill in the form with the following information for testnet:
- Network Name: Bitfinity TestNet
- New RPC URL:
https://testnet.bitfinity.network/ - Chain ID: 355113
- Currency Symbol: BTF
- Block Explorer URL (Optional):
https://explorer.testnet.bitfinity.network
All the Bitfinity RPC endpoint URLs and chain IDs can be found on our Networks page.
Click Save, and you should see Bitfinity Testnet or Bitfinity Mainnet is now the network selected in MetaMask.
To see MetaMask in action, we will connect it to Remix and perform some transactions.
Deploying an ERC-20 Token using Remix
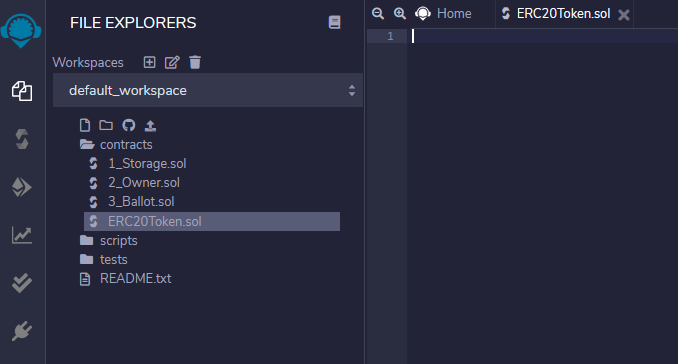
In a new tab, open the Remix IDE at remix.ethereum.org.
It might take a minute to load, but once it has, create a new file ERC20Token.sol in the workspace panel on the left:
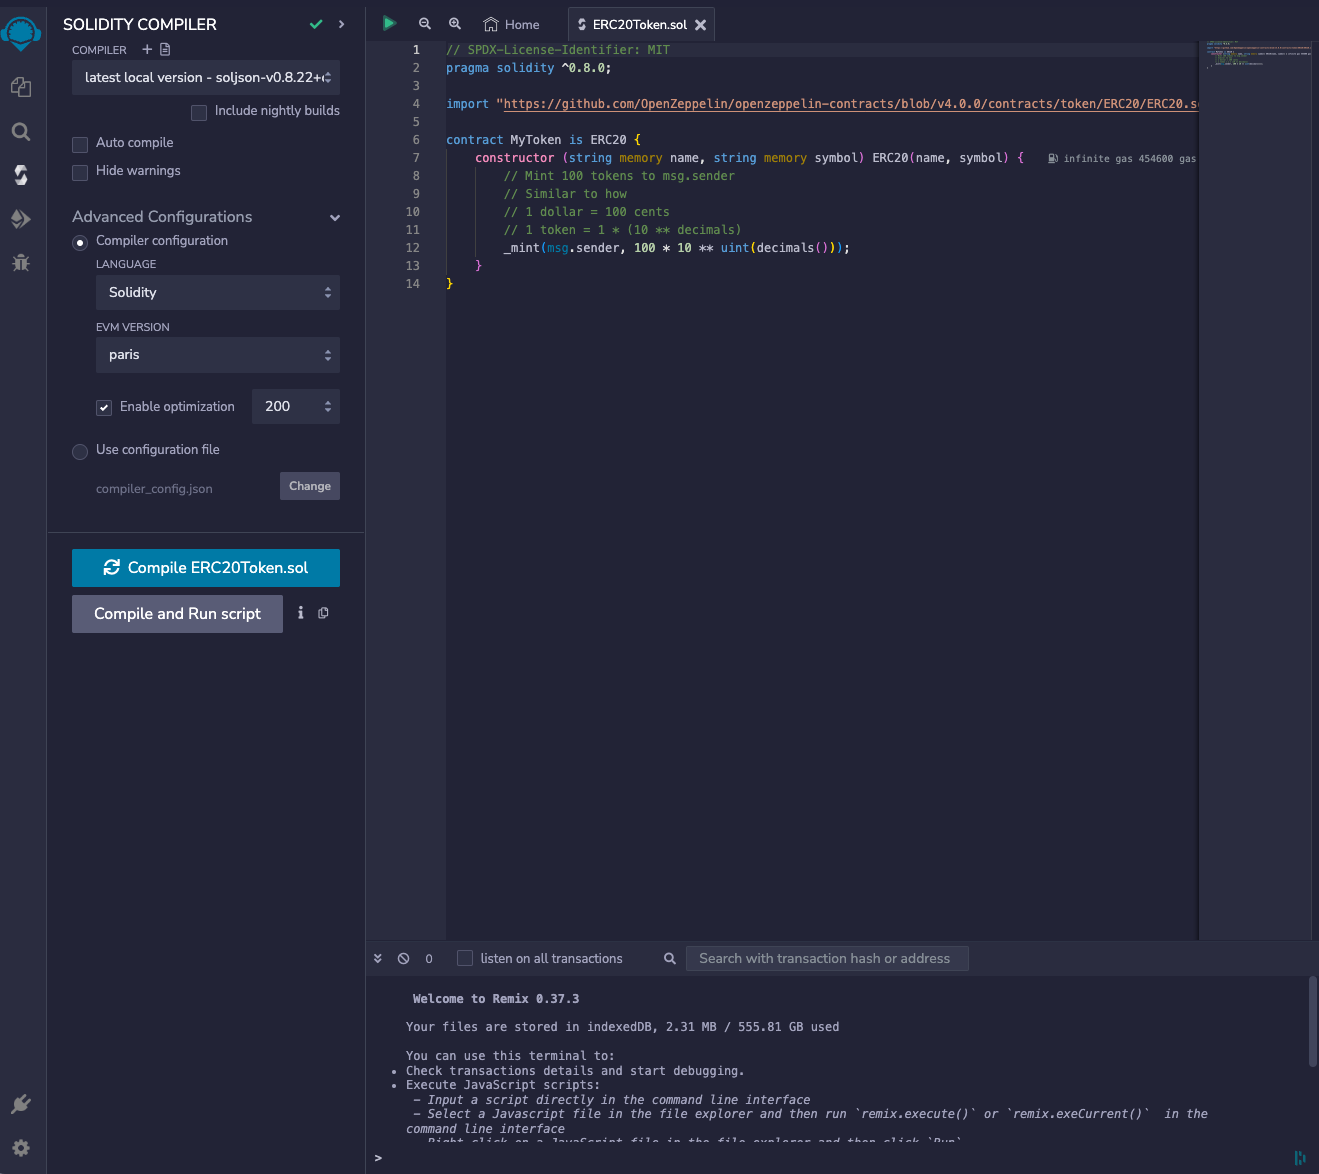
Copy and paste the following code into the central editor panel:
// SPDX-License-Identifier: MIT
pragma solidity ^0.8.0;

import "https://github.com/OpenZeppelin/openzeppelin-contracts/blob/v4.0.0/contracts/token/ERC20/ERC20.sol";

contract MyToken is ERC20 {
    constructor (string memory name, string memory symbol) ERC20(name, symbol) {
        // Mint 100 tokens to msg.sender
        // Similar to how
        // 1 dollar = 100 cents
        // 1 token = 1 * (10 ** decimals)
        _mint(msg.sender, 100 * 10 ** uint(decimals()));
    }
}
This code is a slightly modified (the Solidity compiler and OpenZeppelin versions are newer) version of the example from Solidity by Example.
Click the Solidity Compile button on the far left panel (the second icon down);
ensure your selected Solidity compiler version is 0.8 (minor versions within 0.8, e.g., 0.8.4 work too), enable optimization, and set the EVM version to paris and click Compile MyToken.sol.
The paris EVM version is required to be selected for Bitfinity.
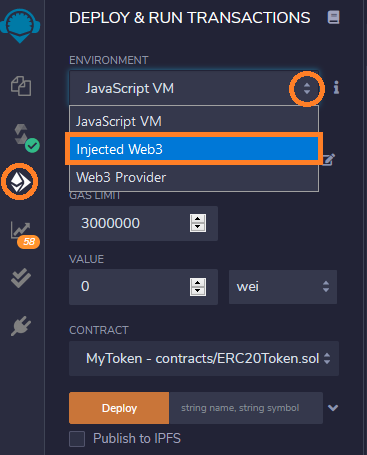
Once the contract is compiled, click the Deploy & run transactions button in the far left panel (the icon below the Solidity compiler).
In the ENVIRONMENT drop-down select Injected Web3.
You can override the gas limit in the Deploy & run transactions panel. The default is 3000000, which is sufficient for this example.
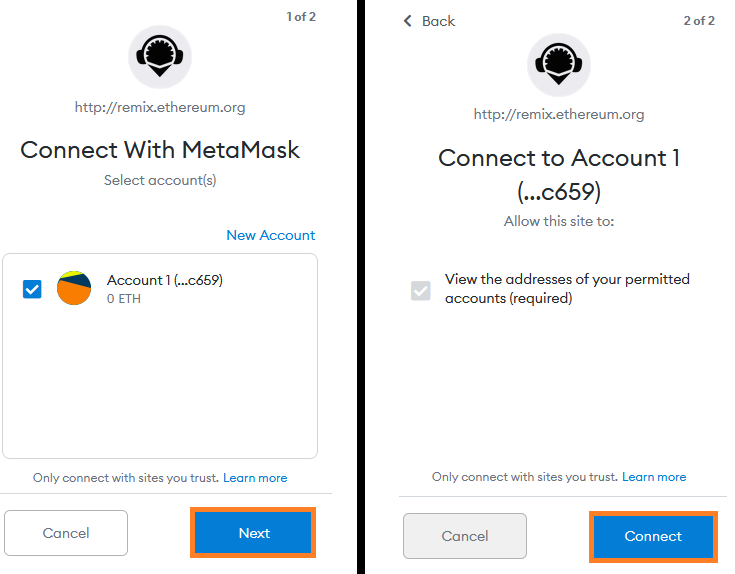
You will see a MetaMask pop-up window asking you to give the Remix IDE permission to access it.
Click Next and then Connect to grant access.
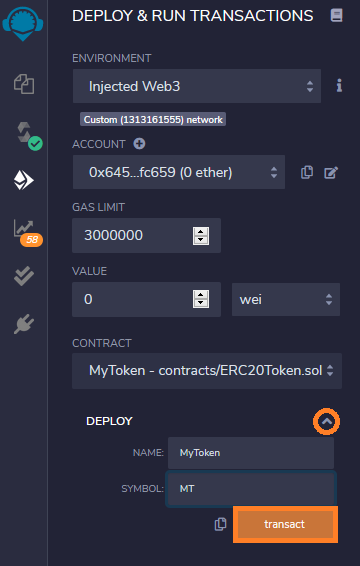
Back in the Remix interface, click the arrow next to the DEPLOY section of the left panel.
Fill in the token details with whatever you like (MyToken and MT in the example), and click transact.
Another MetaMask pop-up will appear asking you to confirm the transaction.
Click Confirm.
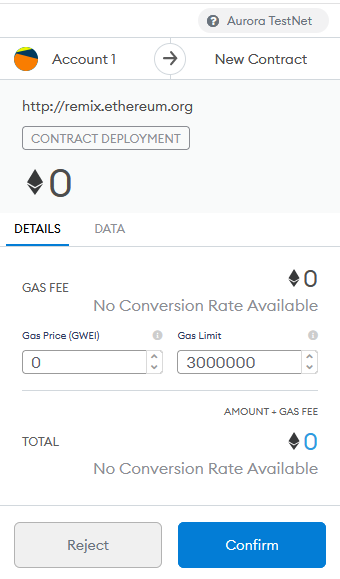
Transaction cost ~$0.02
After a few moments the transaction will be confirmed by the network.
You will see a success message in the bottom panel and the contract listed under Deployed Contracts on the left panel.
Click the copy button to copy the address of the newly deployed contract.

Now that the contract is deployed on the Bitfinity network, we can interact with it via MetaMask.
Adding an ERC-20 Token to MetaMask
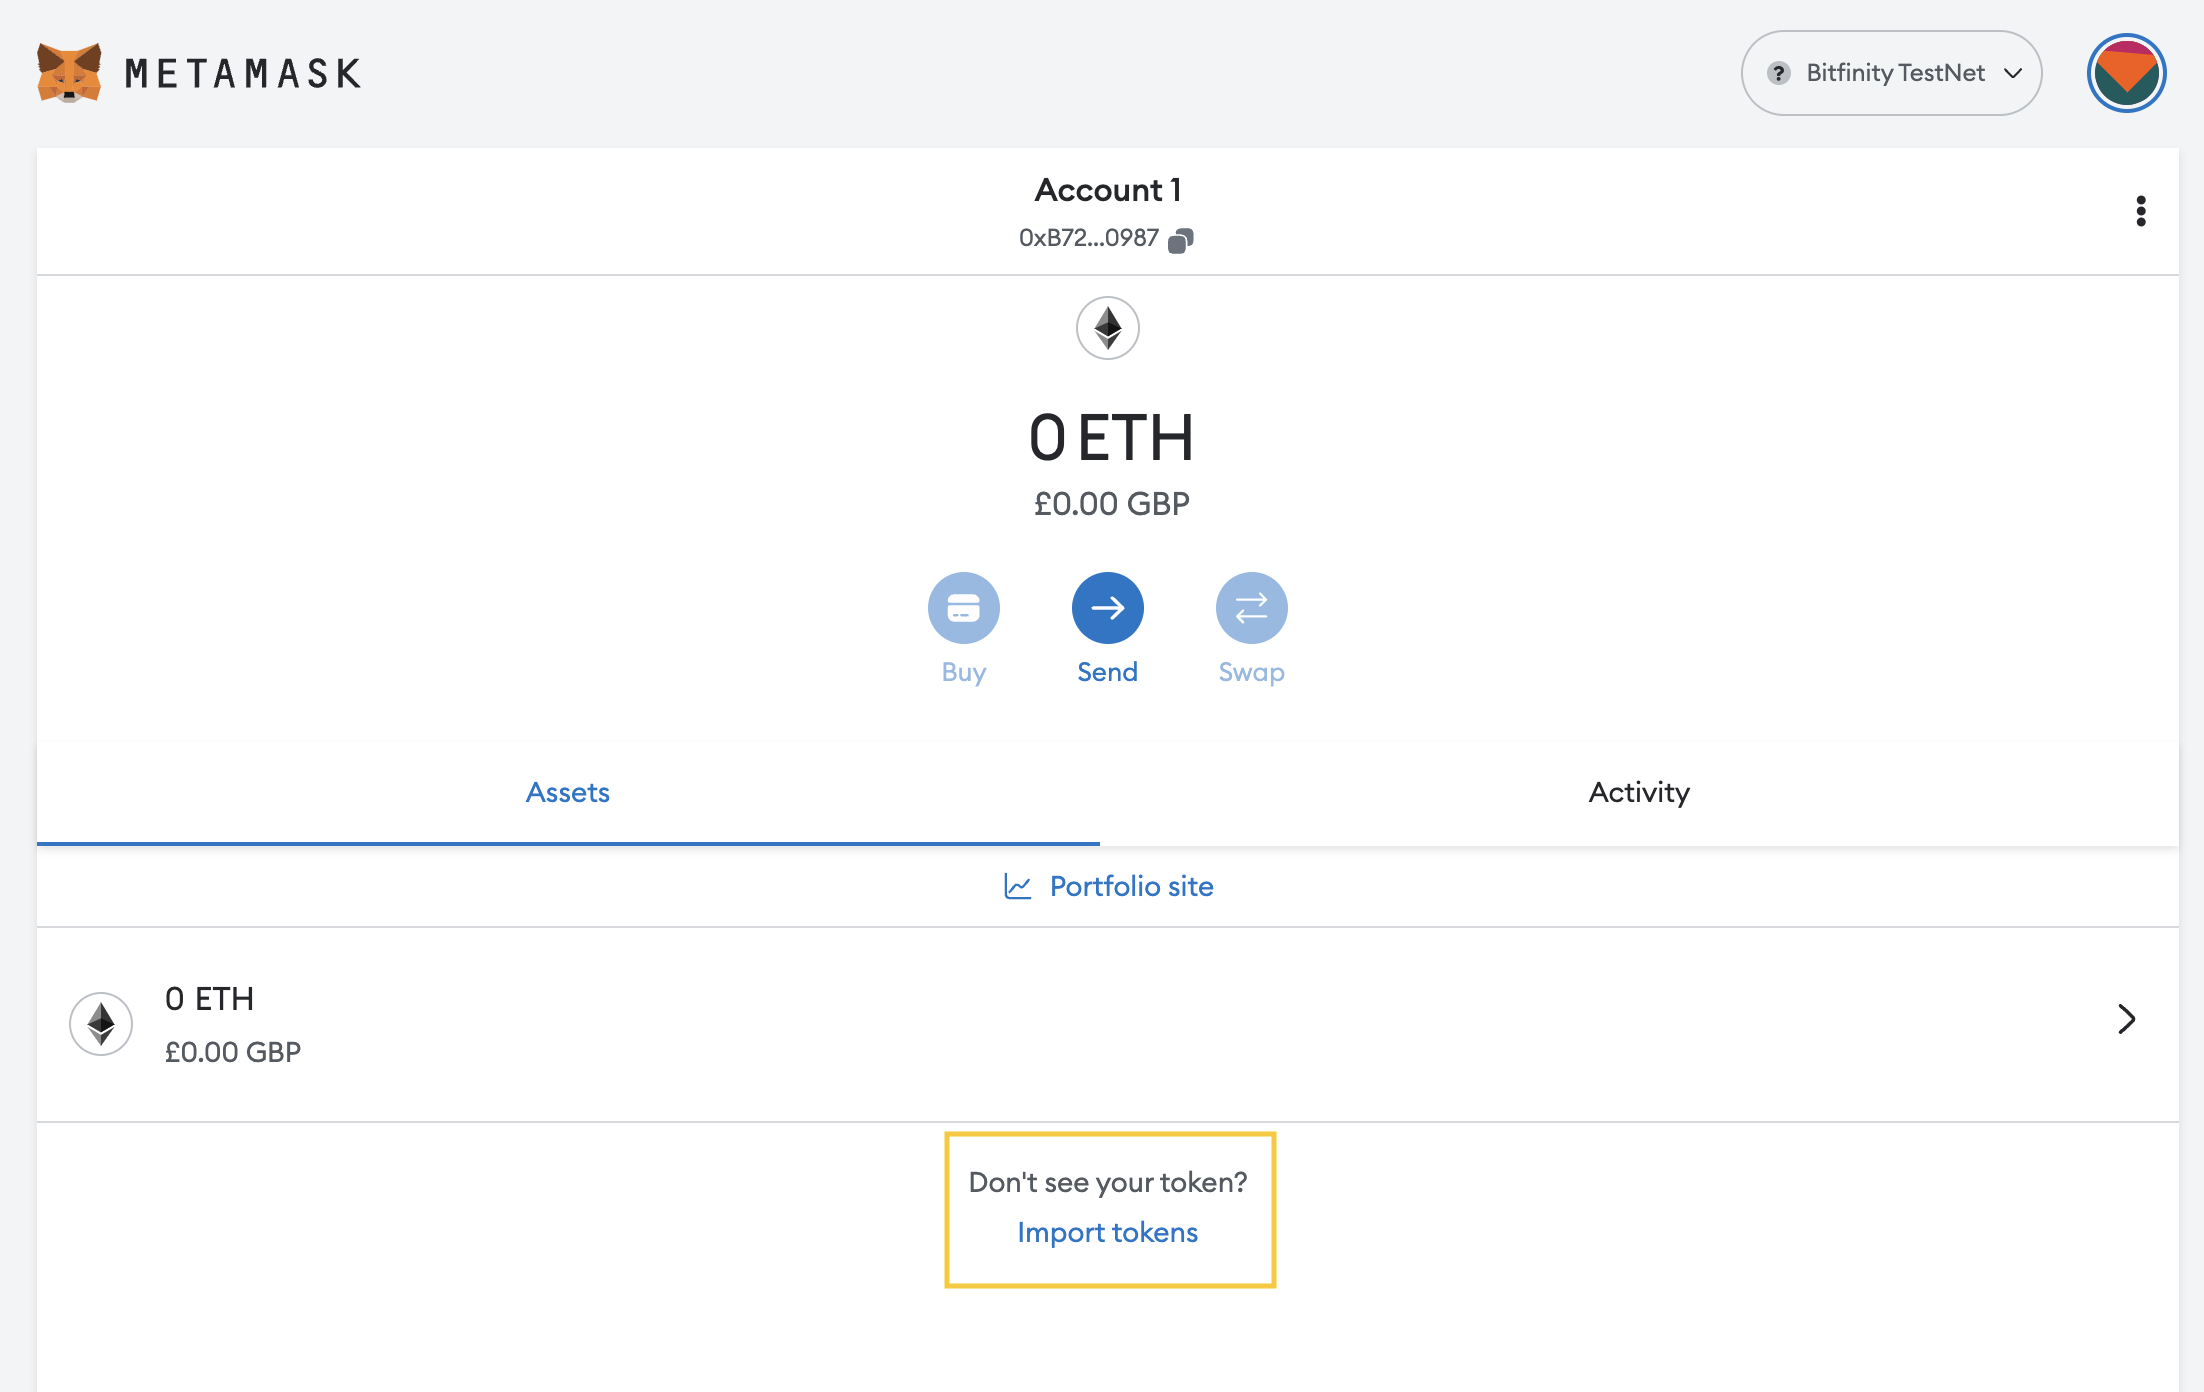
In the MetaMask interface (with the Bitfinity Testnet network still selected), click the Add Token button:
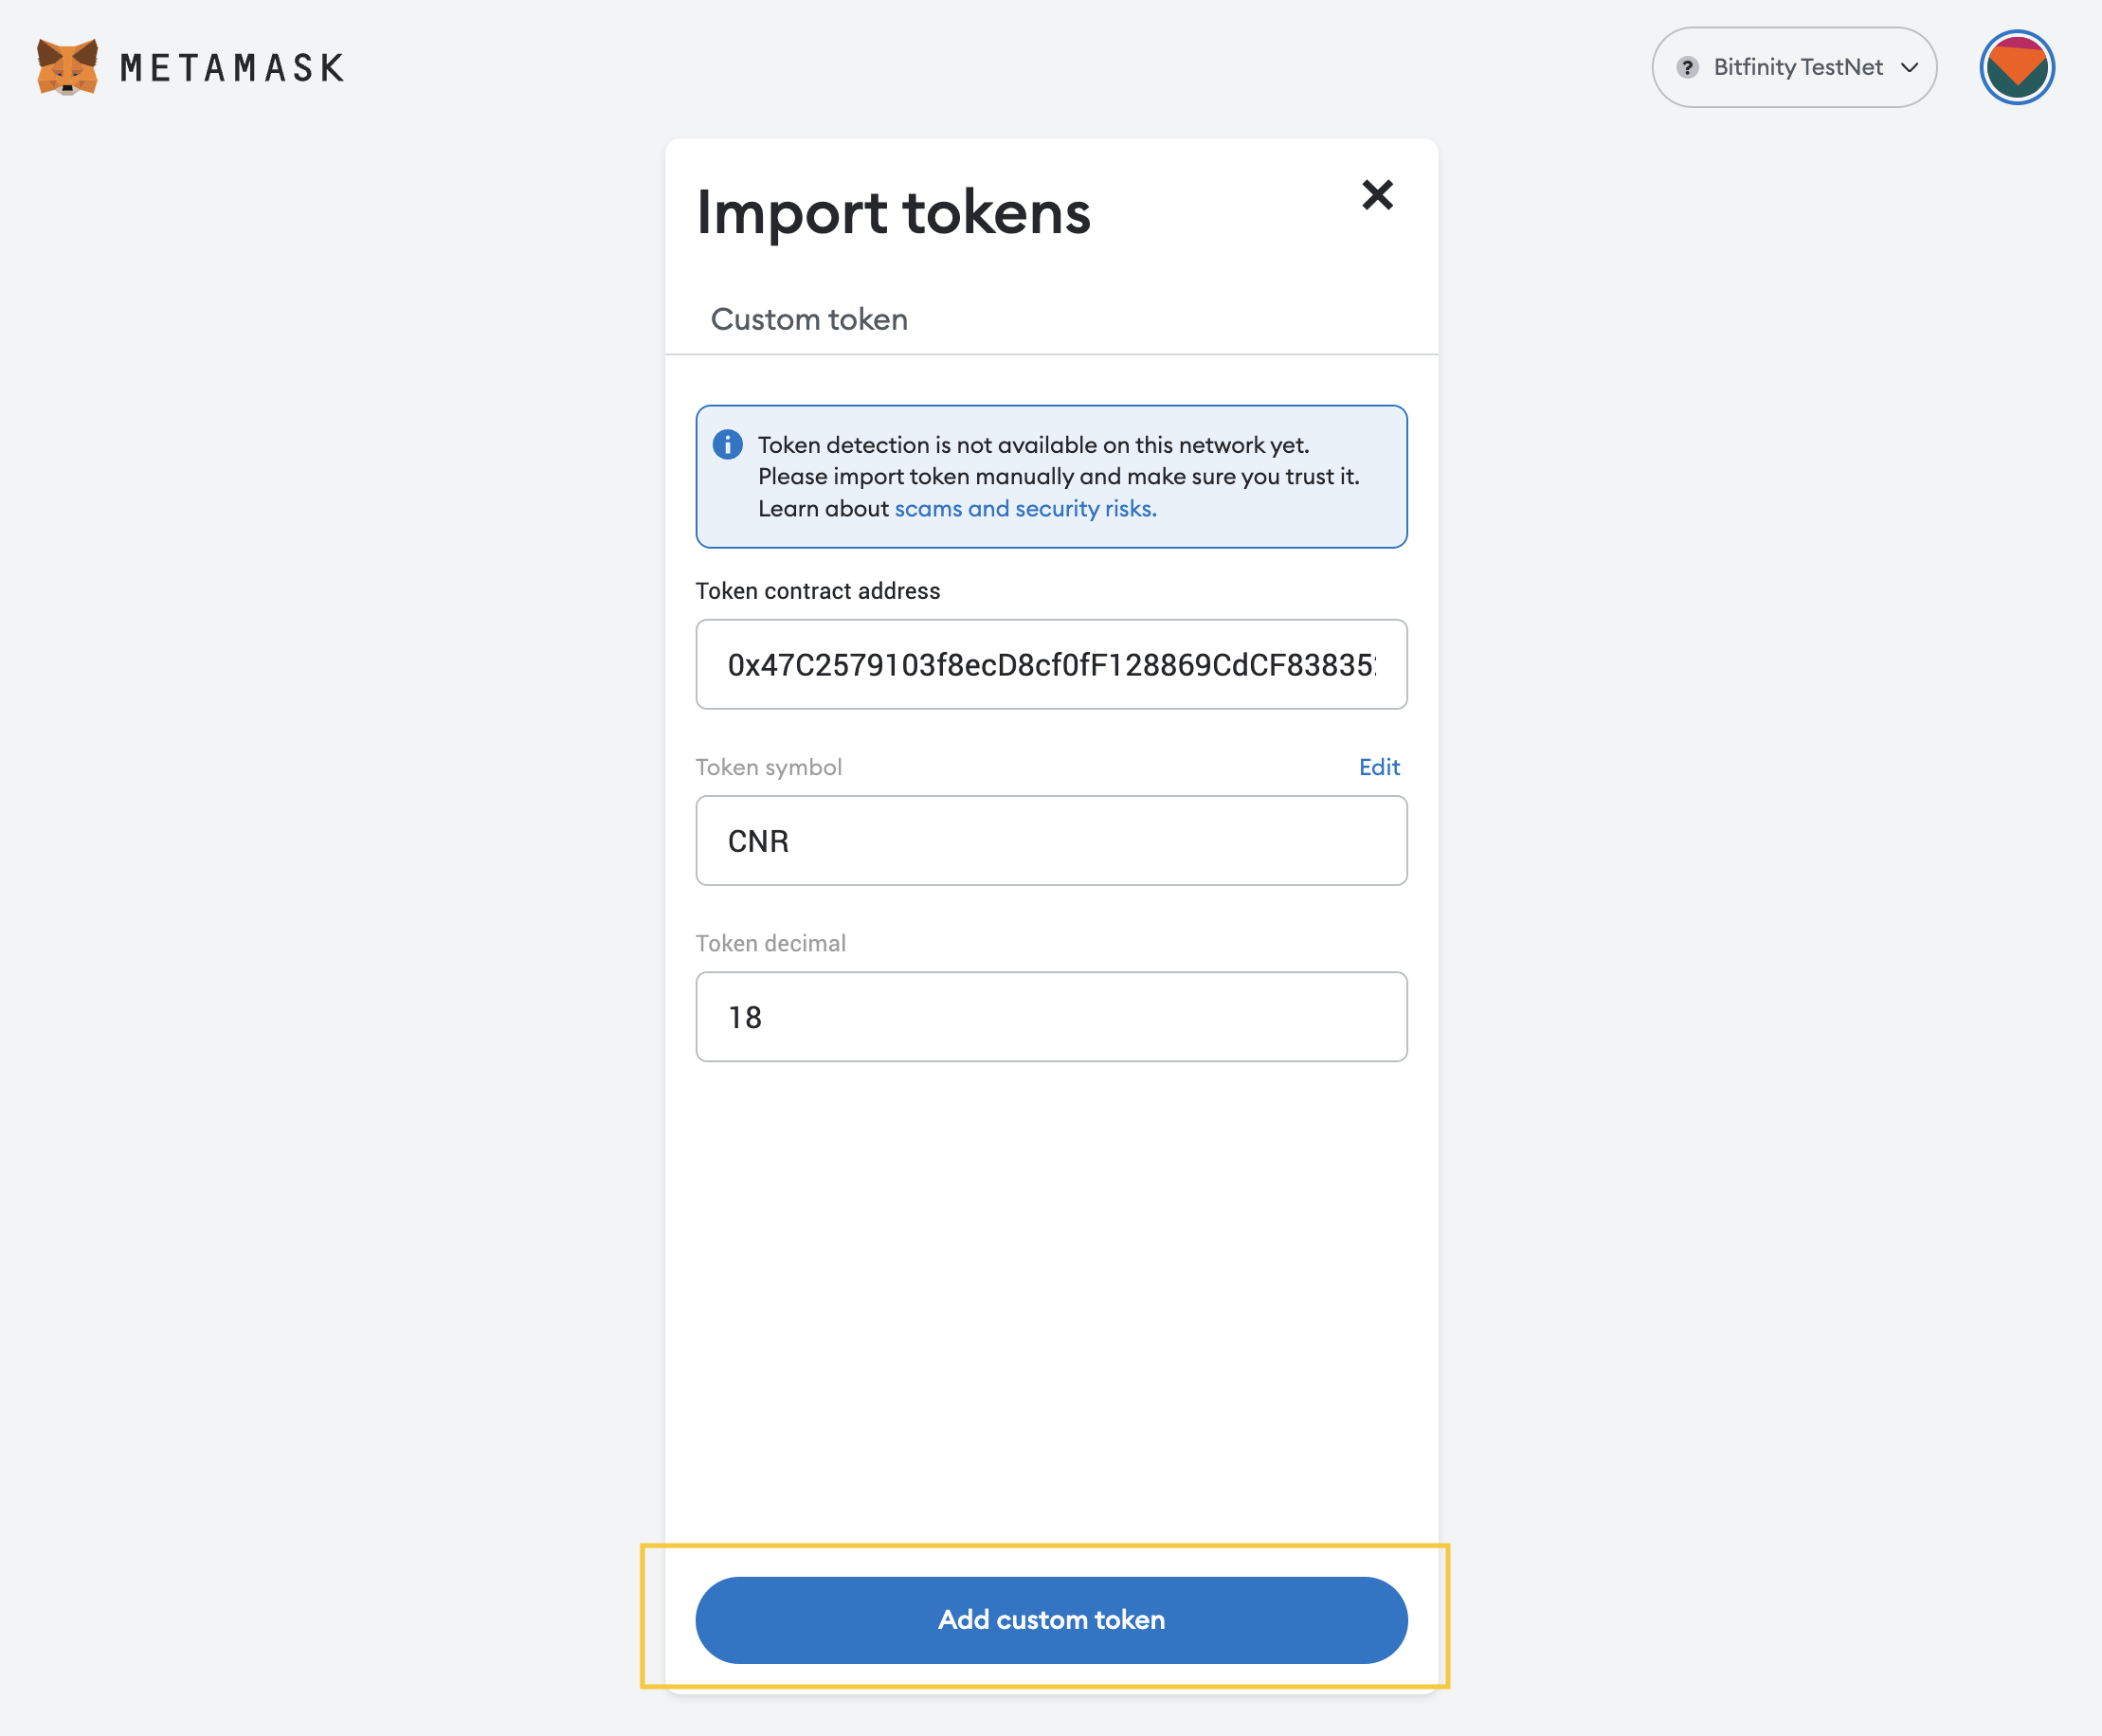
Paste the token address copied from Remix in the previous step.
The remaining token details should fill in automatically as MetaMask finds the contract on-chain.
Click Next:
On the next screen you see the balance (100 tokens), as minted in our contract constructor.
Click Add Tokens:
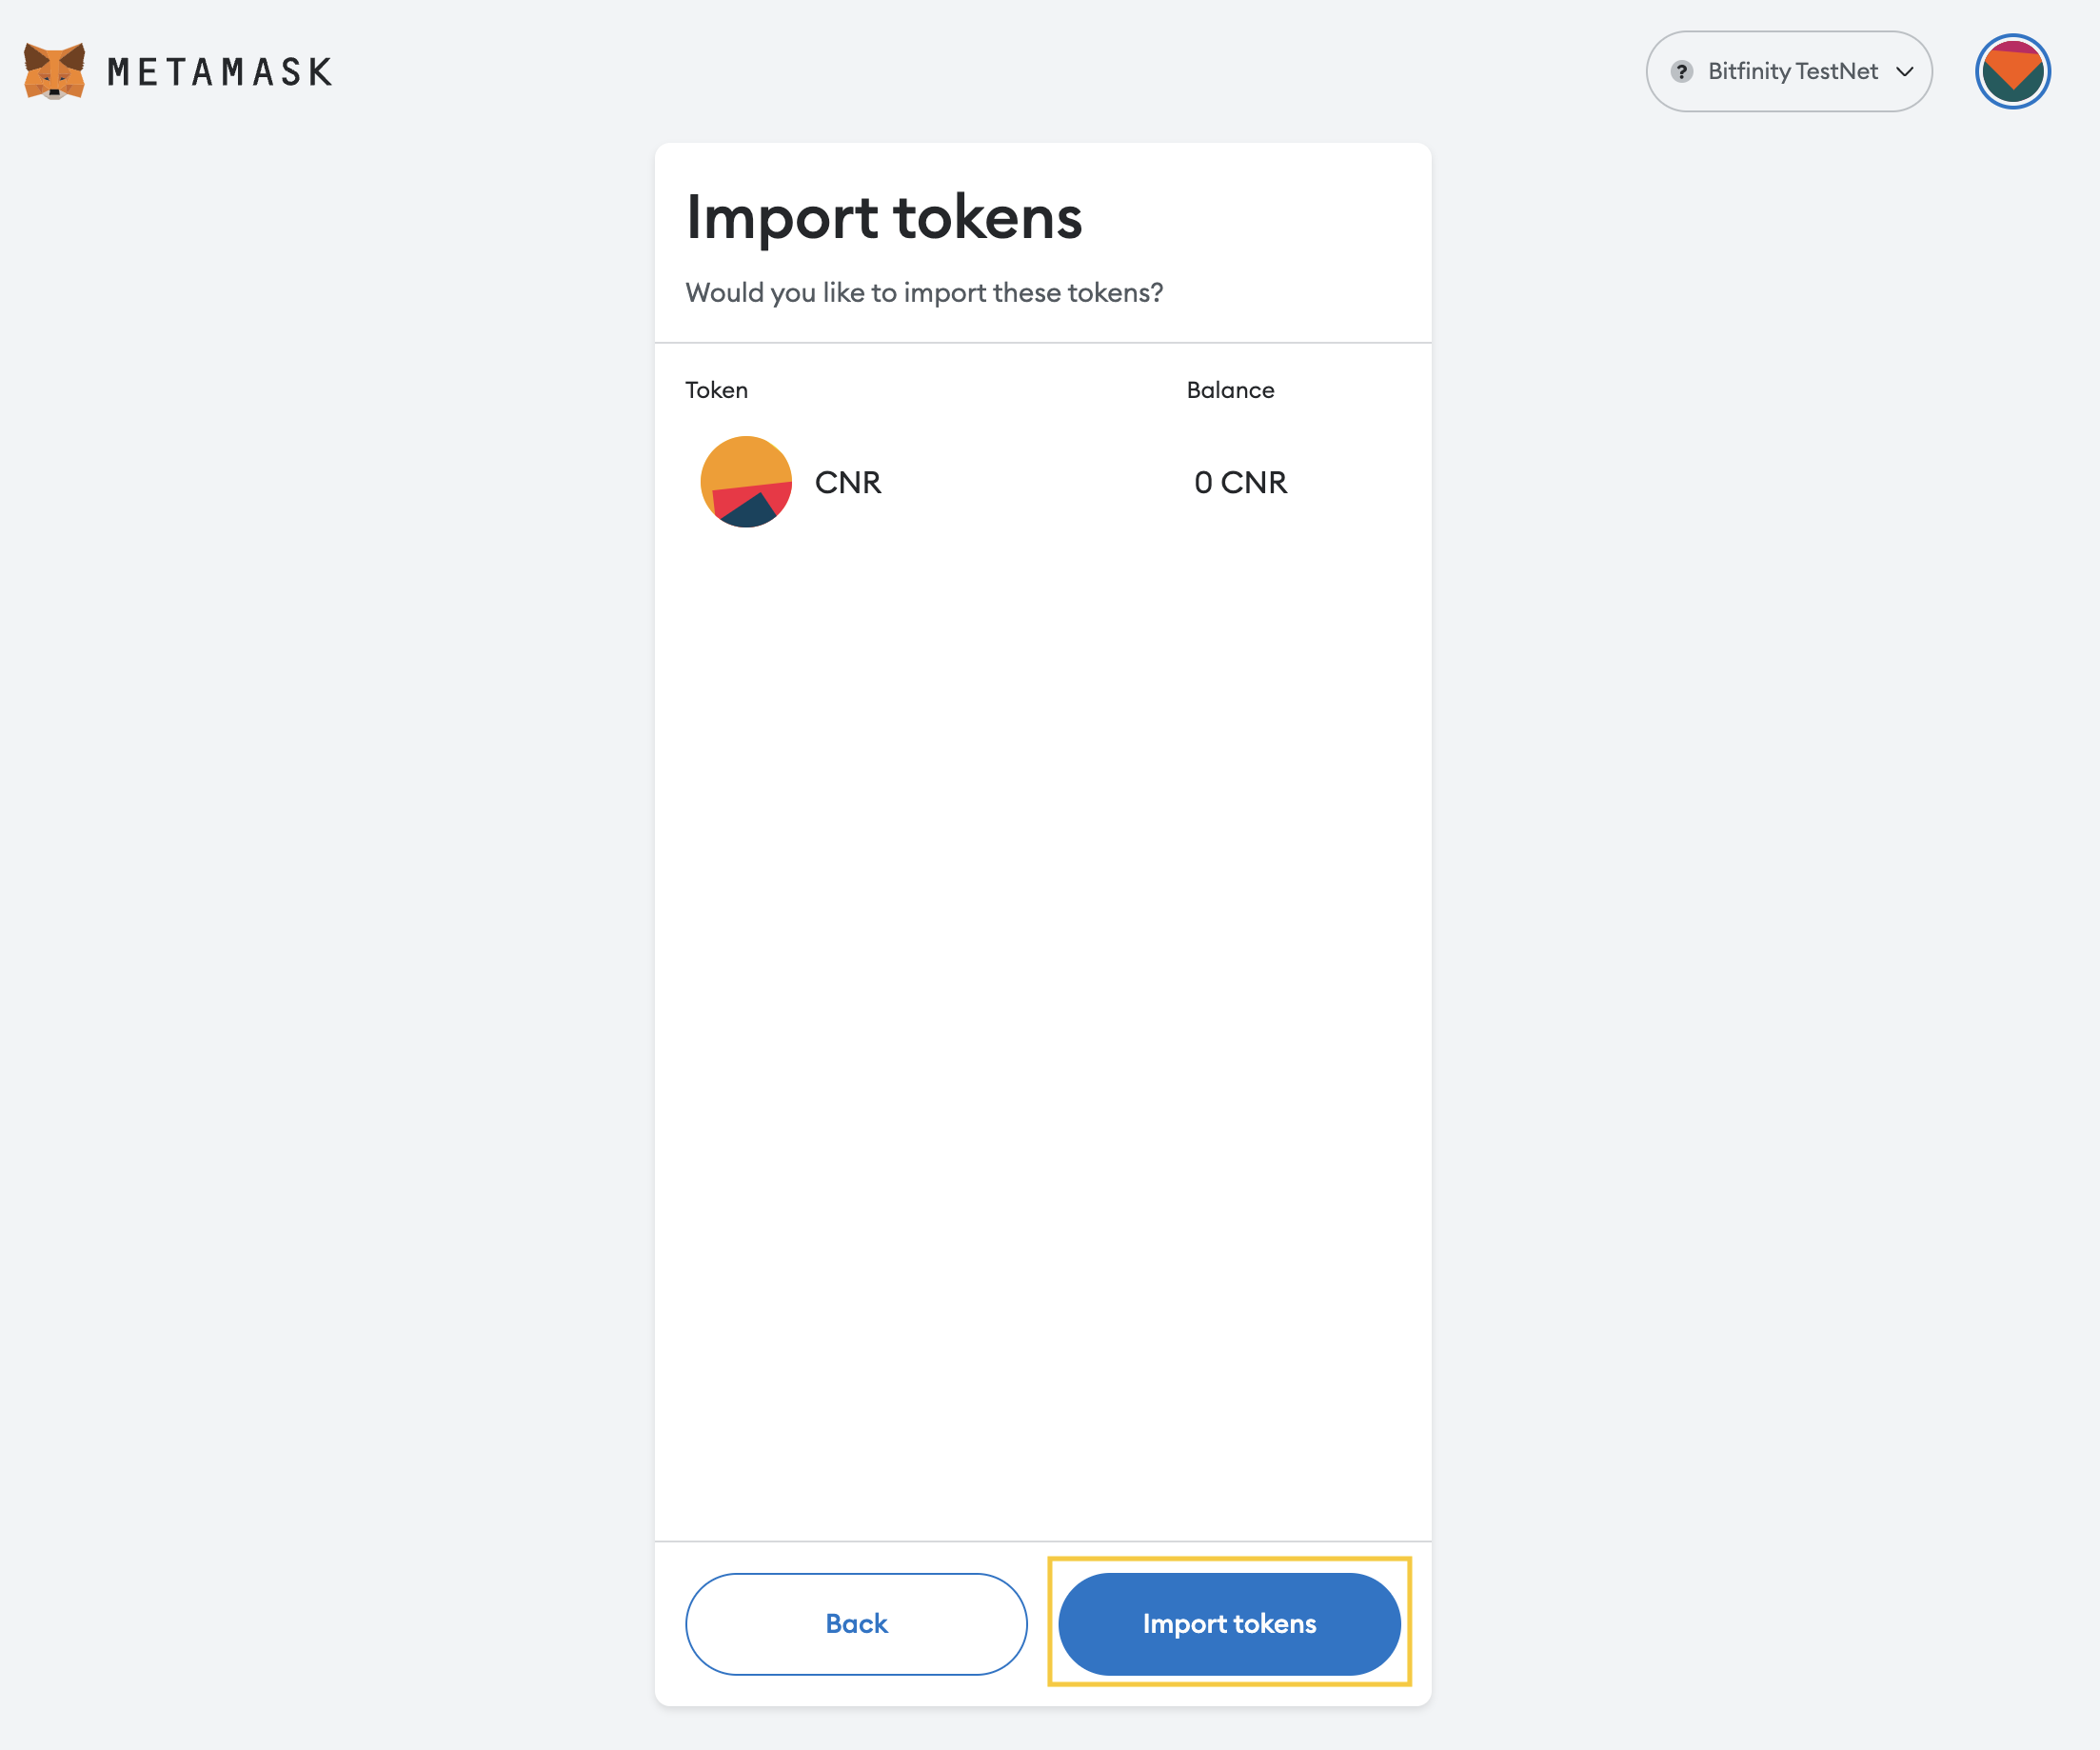
The token has now been added to MetaMask and we can use the MetaMask interface to view the token balance and to transfer the token to others.
Summary
In this tutorial we connected MetaMask to the Bitfinity Testnet, deployed an ERC-20 token contract using Remix, and transferred that token using MetaMask. The only difference to doing this on the original Ethereum network was setting the RPC endpoint to be Bitfinity's.